Newsworthy Girl Birth Announcement
Shutterfly has cute birth announcements and Valentine's cards.
View the entire collection of cards.
 Well this is what I made today. Sorry, it's not my photo, I was too lazy to take pictures and the kitchen is a disaster area. We're having the cabinets painted!!!
Well back to the story about marinading the apples. When you fill the pie with the apples you notice there is a TON of juice left in the bottom of the bowl. I wanted to use the reserved liquid and quickly thought about a caramel sauce. I scoured the Internet for a recipe I could use to make caramel sauce with the liquid. I think I searched apple caramel sauce... I found something at the Better Homes and Gardens Website.
Caramel Sauce
Well this is what I made today. Sorry, it's not my photo, I was too lazy to take pictures and the kitchen is a disaster area. We're having the cabinets painted!!!
Well back to the story about marinading the apples. When you fill the pie with the apples you notice there is a TON of juice left in the bottom of the bowl. I wanted to use the reserved liquid and quickly thought about a caramel sauce. I scoured the Internet for a recipe I could use to make caramel sauce with the liquid. I think I searched apple caramel sauce... I found something at the Better Homes and Gardens Website.
Caramel Sauce
1. For the Caramel Sauce, in a small saucepan combine the brown sugar and 1 tablespoon cornstarch. Add 1/4 cup apple cider or apple juice and butter. Cook and stir over medium heat until thickened and bubbly. Cook and stir for 2 minutes more. Remove from heat. In a small bowl beat 1 egg yolk; gradually stir in 1/2 cup of the hot brown sugar mixture. Add the egg mixture to the saucepan. Cook and stir until bubbly; reduce heat. Cook and stir for 2 minutes more. Remove from heat; cover and cool. Use 1/2 cup of the Caramel Sauce for the Caramel Cream Filling. If necessary, thin the remaining Caramel Sauce with 1 to 2 teaspoons apple cider or apple juice to make a topping of drizzling consistency. Makes 3/4 cup.
2. For Caramel Cream Filling, in a bowl beat 1, 8-ounce cream cheese until fluffy. Gradually beat in 1/2 cup of the Caramel Sauce.
 Did you notice the caramel cream filling... OHHHH YUMMMM!!! I'm gonna have to think of how I can use caramel cream somewhere. I was thinking on pumpkin bars, spice cake or even a chocolate layer cake? Maybe in between 2 oatmeal cookies?? I'm getting a little carried away.
I was happy to find a recipe where I could use the reserved liquid from the apples- waste not, want not.
Now on to eating the PIE... with caramel drizzled on top :)
Did you notice the caramel cream filling... OHHHH YUMMMM!!! I'm gonna have to think of how I can use caramel cream somewhere. I was thinking on pumpkin bars, spice cake or even a chocolate layer cake? Maybe in between 2 oatmeal cookies?? I'm getting a little carried away.
I was happy to find a recipe where I could use the reserved liquid from the apples- waste not, want not.
Now on to eating the PIE... with caramel drizzled on top :)
 Of course I got everything for 50% off. One of the stems that is kind of blue berries out the left side was only $1.36. I made this entire arrangement with the pot and filling for $25. Oh, here's a tip: don't buy floral green blocks (I don't know the correct name because I never buy them). I use left over styrofoam from packaging.
 I just love having a pretty arrangement to look at as I lay on the couch!
 I decided to put the mum in something and all I could find for a few dollars was a silver bucket. I decided to keep it silver, but I wanted to put something fall themed on it. Believe it or not this is a logo from a picture frame I bought. I changed the words inside the logo to make it fit for fall, but I just loved the logo and knew I would find a way to use it someday.
 I free handed the logo on the bucket with a black paint pen. Who knows what color this bucket could be next?
 I just found some pumpkins to put around the bottom. Happy fall!
 I sanded the top and legs. My original thought was just paint it black and leave it as a coffee table.
 Then one night when we were watching a movie in the family room I got the idea that I should make it a big ottoman. Yes, an idea during a movie. I watch movies with him sometimes and sometimes I pretend to watch them just to spend time together. Now I had to figure out how to do it. This is what I came up with and the questions I asked myself:
 You can see here where I stapled around the bottom...
 The biggest question after I tufted the ottoman was how to attach the buttons.. this picture doesn't show the tufting yet. You'll never guess what I used to attach the button to the screw. BREAD TIES!! I can't believe I make fun of my husband for keeping them, but one Sunday afternoon they came to the rescue when I was desperate to finish this project.


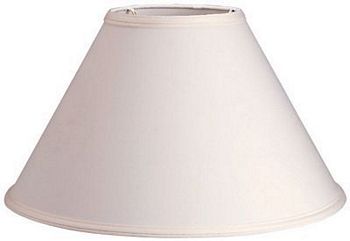
 Did you notice this is the same fabric from the lampshade?
 Put them together and see what you get...

 Since this was my first shade I made a few mistakes... I forgot to put the original lamp shade seam in the back with the fabric seam. I also should have thought about how dark the fabric was - blocking the light much. I guess it gives the room more ambiance.
You'll see where the rest of this fabric is from in a minute...
Since this was my first shade I made a few mistakes... I forgot to put the original lamp shade seam in the back with the fabric seam. I also should have thought about how dark the fabric was - blocking the light much. I guess it gives the room more ambiance.
You'll see where the rest of this fabric is from in a minute...
 We sold the old table on craigslist in a matter of hours. Two old ladies came by the house the next day with a pick-up truck.
 On to what I found at the thrift store... a picture with a frame ($6) and a lamp ($4.50). I forgot to take a picture of the beautiful painting (insert sarcasm) that was in the frame. I have been looking for a large frame to paint white and put a chalkboard inside to mount on the kitchen wall. This project is to be continued...
 This is the frame... more closeup pictures to come.
 The lamp... just the height I was looking for, but it needs spray paint. I was just going to do black, but I was out. Can you believe I ran out of black spray paint? I used the bronzed metallic spray I used on the kitchen cabinet knobs.
 Always remember to tape off the electronics before spraying.

 What do you think? Pretty good for a $4.50 lamp.
 Leftover wainscoting from the bathroom was added to the roof. The roof was painted white from extra white paint I found in the basement.
 The house was painted the same color as the new bathroom walls and the base was painted a green color I found in my acrylic paints.
I took some dark brown paint to age the paint and bring out the details of the house.
The house was painted the same color as the new bathroom walls and the base was painted a green color I found in my acrylic paints.
I took some dark brown paint to age the paint and bring out the details of the house.
 I added vines to the sides...
 I stuffed some extra moss in the holes to appear like their was a nest inside.
 I can't wait to see how it helps our relay team raise funds for cancer research!
 The little birdie was only $1.99 from Gordmans. The white container was on clearance for $4. I took styrofoam from my new table and used it instead of buying expensive floral stuffing for the bottom of the container. I added white hydrangeas with white floral buds - about $5 with some moss filler.


 This little chickie was only $1.99 too. I took a small 99 cent wreath and glued some moss to make a small nest. The eggs were already spring colors, but I "flicked" brown paint on them to distress them slightly. I know "flicked" is a very technical term, but I don't know what else to call taking watery paint and flicking it in the direction of the eggs.
 What are your favorite new spring decorations?
 This might be my husbands favorite new recipe... to eat. He occasionally asks for rice krispy treats, but they are pretty boring to me. Pampered Chef came through for me again with an awesome recipe!
Chocolate Peanut Butter Crunch Bars
¼ cup dry-roasted peanuts 3 cups mini pretzel twists (about 1 2∕3 cups coarsely crushed), divided 3 cups crisp rice cereal ¾ cup butter (1½ sticks), divided 1 bag (10.5 oz) miniature marshmallows ½ cup light corn syrup, divided 1 bag (10 oz) peanut butter morsels 1 cup semi-sweet chocolate morsels
Coarsely chop peanuts using Food Chopper; set aside. Place pretzels into large resealable plastic bag; coarsely crush using flat side of Meat Tenderizer. Set aside ¹∕3 cup of the pretzels. Place remaining pretzels and cereal in Stainless Mixing Bowl.
Place 6 tbsp of the butter in Classic Batter Bowl. Microwave on HIGH 30–45 seconds or until melted. Add marshmallows; microwave on HIGH 45–60 seconds. Stir until marshmallows are completely melted using Mix ‘N Scraper®. Immediately add marshmallow mixture to mixing bowl; mix thoroughly. Spread crust evenly over 9x13 pan; firmly press into pan using waxed paper.
Combine 2 tbsp of the butter and half of the corn syrup in Small Micro-Cooker®. Microwave, uncovered, on HIGH 30–45 seconds or until melted. Stir in peanut butter morsels; mix until melted (mixture will be stiff). Spread peanut butter mixture over crust using Small Spreader.
For ganache, place remaining butter and corn syrup in Small Batter Bowl. Microwave on HIGH 30–45 seconds or until melted. Stir in chocolate morsels; mix until smooth. Spread ganache evenly over peanut butter mixture. Sprinkle with peanuts and reserved pretzels. Place in freezer 5–10 minutes or until ganache is set. Cut into 24 squares; cut squares in half.


This hanging vase was a Christmas gift from my grandma. It's very elegant and will help me bring in a natural element to the room. I was thinking of putting small sea shells in the bottom. I'll look for natural colored flowers and a just a few stems for this.


I'm not sure what I'll fill it with, but I'll think of something. Leave a comment if you have an idea.
I'd say he's got some great ideas and I didn't do too bad on actually completing the project.

 The tub is caulked...
 The mirror and towel bar are hung...
  The sink and faucet are working...
 It's almost a complete bathroom...
 The curtain is hung to hide the peach tub. We're just missing the toilet seat... and a little toilet paper :)