Sunday, October 17, 2010

Fall = Dutch Apple Pie and Caramel Sauce

This week is my husband's birthday. I asked him what he wanted for a birthday cake. After pondering this question for a few hours he landed on Apple Pie-- my how our taste buds change as we age... last year he wanted a McDonald's Cake. I love a good dutch apple pie. I love the topping and pie crust-- it's like the best of apple pie and apple crisp all in one dessert. My aunt shared a secret to a great apple pie when I was a teenager. She told me she cuts her apples and prepares the filling (with lemon juice so they don't turn brown) the day before she bakes the pie. It really lets all the flavors come together. I try to marinate the apples overnight if I have time. Last night I was putting the apples together... side note: if you don't have an apple peeler/corer you have to get one. It's an amazing invention and saves hours of peeling. It also helps us perfectionists get exactly the apple cut the same thickness. I sell them with Pampered Chef, but before I was a consultant I had a Cuisinart one and the suctioned bottom wouldn't stay in place all the time. Well this is what I made today. Sorry, it's not my photo, I was too lazy to take pictures and the kitchen is a disaster area. We're having the cabinets painted!!! Well back to the story about marinading the apples. When you fill the pie with the apples you notice there is a TON of juice left in the bottom of the bowl. I wanted to use the reserved liquid and quickly thought about a caramel sauce. I scoured the Internet for a recipe I could use to make caramel sauce with the liquid. I think I searched apple caramel sauce... I found something at the Better Homes and Gardens Website. Caramel Sauce

Ingredients

  • 2/3 cup packed brown sugar
  • 1 tablespoon cornstarch
  • 1/4 cup apple cider or apple juice (marinade from apples)
  • 1/4 cup butter
  • 1 egg yolk

Directions

1. For the Caramel Sauce, in a small saucepan combine the brown sugar and 1 tablespoon cornstarch. Add 1/4 cup apple cider or apple juice and butter. Cook and stir over medium heat until thickened and bubbly. Cook and stir for 2 minutes more. Remove from heat. In a small bowl beat 1 egg yolk; gradually stir in 1/2 cup of the hot brown sugar mixture. Add the egg mixture to the saucepan. Cook and stir until bubbly; reduce heat. Cook and stir for 2 minutes more. Remove from heat; cover and cool. Use 1/2 cup of the Caramel Sauce for the Caramel Cream Filling. If necessary, thin the remaining Caramel Sauce with 1 to 2 teaspoons apple cider or apple juice to make a topping of drizzling consistency. Makes 3/4 cup.

2. For Caramel Cream Filling, in a bowl beat 1, 8-ounce cream cheese until fluffy. Gradually beat in 1/2 cup of the Caramel Sauce.

Did you notice the caramel cream filling... OHHHH YUMMMM!!! I'm gonna have to think of how I can use caramel cream somewhere. I was thinking on pumpkin bars, spice cake or even a chocolate layer cake? Maybe in between 2 oatmeal cookies?? I'm getting a little carried away. I was happy to find a recipe where I could use the reserved liquid from the apples- waste not, want not. Now on to eating the PIE... with caramel drizzled on top :)

Tuesday, September 21, 2010

Fall Floral

I was at Hobby Lobby last weekend and found this gorgeous pot. Then I quickly realized that I had nothing to put in it. I thought about a house plant, but I think I might kill it. I have 2 in my office and with as much time as I spend there you would think I could water them... well I forget and someone without fail asks if they can water it for me. Oh well, I think the fake ones are just fine! Of course I got everything for 50% off. One of the stems that is kind of blue berries out the left side was only $1.36. I made this entire arrangement with the pot and filling for $25. Oh, here's a tip: don't buy floral green blocks (I don't know the correct name because I never buy them). I use left over styrofoam from packaging. I just love having a pretty arrangement to look at as I lay on the couch!

Fall Entrance

This fall I'm going to finish the kitchen so I'm trying to be as thrifty as possible with my projects. I had this plant stand from a 75% off sale at Hobby Lobby for $5.00. I painted it brown to blend in with the brick. I decided to put the mum in something and all I could find for a few dollars was a silver bucket. I decided to keep it silver, but I wanted to put something fall themed on it. Believe it or not this is a logo from a picture frame I bought. I changed the words inside the logo to make it fit for fall, but I just loved the logo and knew I would find a way to use it someday. I free handed the logo on the bucket with a black paint pen. Who knows what color this bucket could be next? I just found some pumpkins to put around the bottom. Happy fall!

Sunday, September 19, 2010

Coffee Table to Upholstered Ottoman

This is another GREAT find at the local thrift store. I found this table around the fourth of July. The special at the thrift store was to pick a star and on the back there was a discount for your entire order. Well I just so happened to pick a 30% off coupon. This table was a whopping $25, so I got it for just over $18 with tax. It had been loved. When I was sanding I found some crayon marks. I'm sure my mom's tables were loved the same way. I sanded the top and legs. My original thought was just paint it black and leave it as a coffee table. Then one night when we were watching a movie in the family room I got the idea that I should make it a big ottoman. Yes, an idea during a movie. I watch movies with him sometimes and sometimes I pretend to watch them just to spend time together. Now I had to figure out how to do it. This is what I came up with and the questions I asked myself:
  • What color: people are going to put their feet on this, it can't be cream or white... I found the same fabric I made my pillows out of for $6.99/ yard at Hobby Lobby. It was 3 years later and I didn't think I would be lucky and find the same fabric again.
  • How padded should it be? The upholstering padding is super expensive-- $39/ yard. No way!! I'm using mattress pads from Walmart and my MIL's basement.
  • How was I going to attach it? Luckily the coffee table has a small lip on the edges and I was able to staple underneath and hid the staples.
  • I didn't want it to look like a big pillow, so how can I make it tufted? This was a great time... my husband got frustrated and thank goodness my BIL was over. He helped me find just the right length of screw and attach it to the table through the fabric. It was a sight. I was holding the fabric and padding down so it wouldn't tear while he was drilling.
  • What type of buttons should I use for tufting? I found the type you can customize with your own fabric. I think this was the only full price item I purchased at $4/ pack of three.
You can see here where I stapled around the bottom... The biggest question after I tufted the ottoman was how to attach the buttons.. this picture doesn't show the tufting yet. You'll never guess what I used to attach the button to the screw. BREAD TIES!! I can't believe I make fun of my husband for keeping them, but one Sunday afternoon they came to the rescue when I was desperate to finish this project.

Monday, May 31, 2010

DIY Drapes

I was originally going to make a slip cover for a chair with this fabric. I found it on a huge discount from Hancock Fabrics. Can I just say, I find the best deals there. The back of the store has remnant pieces. I can usually get 3-6 yard pieces for $3-$7/ yard. These lined drapes cost me only $42.
The fabric was $4/ yard. The lining was $2/ yard at Walmart. The tabs were FREE. I bought some new black pillows and they were sold as a set wrapped in a ribbon. I sewed the ribbons behind the drapes to have a back tab style. You can find them from $50 -$90 per panel as a solid color. I calculate a savings of 50%-72% by making them myself.
Don't worry you can't make drapes. I didn't have a pattern and just took it one step at a time.
  1. Measure your window - take into account how high you want to hang your rod and how thick you want your bottom hem
  2. Cut your fabric into two identical lengths. If you have patterned fabric, make sure the pattern is going the same direction.
  3. Pin the lining inside the back of the fabric- this way you finish the edges of the curtains and line them at the same time.
  4. Only sew the top and sides of the fabric. Allow the bottom to stay unfinished.
  5. Hang the drapes on the rod and hem them to the exact height you want them from the floor. I think this is the easiest because I hate measuring. Seeing it exactly the want I want it confirms the last bit of sewing will be the last bit of sewing. I don't like resewing something to make it longer or shorter.
  6. Hang the FINISHED drapes.
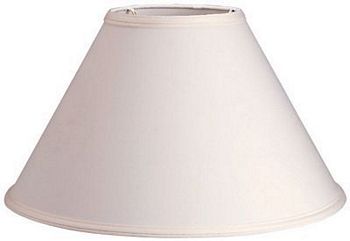
Did you notice this is the same fabric from the lampshade?

A covered lampshade

Do you have some of these? Do you also have some scraps of fabric? Put them together and see what you get...
  1. Get your white lamp shade
  2. Cut the fabric
  3. Use iron-on hemming tape at the edges
  4. Take a complementary color of bias tape and use the hemming tape again on the top and bottom edges
  5. Don't worry about melting the lamp shade... I thought I ruined it a few times, but it just cools down again and molds back the way it was.

Since this was my first shade I made a few mistakes... I forgot to put the original lamp shade seam in the back with the fabric seam. I also should have thought about how dark the fabric was - blocking the light much. I guess it gives the room more ambiance. You'll see where the rest of this fabric is from in a minute...

Eating just got prettier

I don't think I've introduced you to my new table... It's half stained and black. The cushions are cream like the old table. We bought 4 more to have a set of 8. We're excited for all of our summer guests. We sold the old table on craigslist in a matter of hours. Two old ladies came by the house the next day with a pick-up truck.
I love it. I hope you can enjoy a meal with us soon :)

Tuesday, March 30, 2010

Thrift Store Run

I had taken a break from the thrift store, mainly because they hadn't had many new donations. I have been waiting for the weather to get warm and people to get motivated to donate again. Our local thrift store is directly related to our local hospital-- so I feel pretty good about donating and buying knowing that I am helping a good cause. I save money and donate to charity all at the same time. Don't get your hopes up... I had this shelf, but it needed to be painted white to be hung in the gray bedroom. It was just in the basement for my spray paint party on Sunday. On to what I found at the thrift store... a picture with a frame ($6) and a lamp ($4.50). I forgot to take a picture of the beautiful painting (insert sarcasm) that was in the frame. I have been looking for a large frame to paint white and put a chalkboard inside to mount on the kitchen wall. This project is to be continued... This is the frame... more closeup pictures to come. The lamp... just the height I was looking for, but it needs spray paint. I was just going to do black, but I was out. Can you believe I ran out of black spray paint? I used the bronzed metallic spray I used on the kitchen cabinet knobs. Always remember to tape off the electronics before spraying. What do you think? Pretty good for a $4.50 lamp.

Bird Houses for Relay for Life

Our Relay for Life team at church is doing an auction of bird houses. I was given a blank slate and a deadline... this is how it was done with things I just had around the house. Leftover wainscoting from the bathroom was added to the roof. The roof was painted white from extra white paint I found in the basement. The house was painted the same color as the new bathroom walls and the base was painted a green color I found in my acrylic paints. I took some dark brown paint to age the paint and bring out the details of the house. I added vines to the sides... I stuffed some extra moss in the holes to appear like their was a nest inside. I can't wait to see how it helps our relay team raise funds for cancer research!

Some Spring Decorations

The little birdie was only $1.99 from Gordmans. The white container was on clearance for $4. I took styrofoam from my new table and used it instead of buying expensive floral stuffing for the bottom of the container. I added white hydrangeas with white floral buds - about $5 with some moss filler. This little chickie was only $1.99 too. I took a small 99 cent wreath and glued some moss to make a small nest. The eggs were already spring colors, but I "flicked" brown paint on them to distress them slightly. I know "flicked" is a very technical term, but I don't know what else to call taking watery paint and flicking it in the direction of the eggs. What are your favorite new spring decorations?

Chocolate Peanut Butter Crunch Bars

This might be my husbands favorite new recipe... to eat. He occasionally asks for rice krispy treats, but they are pretty boring to me. Pampered Chef came through for me again with an awesome recipe!

Chocolate Peanut Butter Crunch Bars

¼ cup dry-roasted peanuts 3 cups mini pretzel twists (about 1 2∕3 cups coarsely crushed), divided 3 cups crisp rice cereal ¾ cup butter (1½ sticks), divided 1 bag (10.5 oz) miniature marshmallows ½ cup light corn syrup, divided 1 bag (10 oz) peanut butter morsels 1 cup semi-sweet chocolate morsels

Coarsely chop peanuts using Food Chopper; set aside. Place pretzels into large resealable plastic bag; coarsely crush using flat side of Meat Tenderizer. Set aside ¹∕3 cup of the pretzels. Place remaining pretzels and cereal in Stainless Mixing Bowl.

Place 6 tbsp of the butter in Classic Batter Bowl. Microwave on HIGH 30–45 seconds or until melted. Add marshmallows; microwave on HIGH 45–60 seconds. Stir until marshmallows are completely melted using Mix ‘N Scraper®. Immediately add marshmallow mixture to mixing bowl; mix thoroughly. Spread crust evenly over 9x13 pan; firmly press into pan using waxed paper.

Combine 2 tbsp of the butter and half of the corn syrup in Small Micro-Cooker®. Microwave, uncovered, on HIGH 30–45 seconds or until melted. Stir in peanut butter morsels; mix until melted (mixture will be stiff). Spread peanut butter mixture over crust using Small Spreader.

For ganache, place remaining butter and corn syrup in Small Batter Bowl. Microwave on HIGH 30–45 seconds or until melted. Stir in chocolate morsels; mix until smooth. Spread ganache evenly over peanut butter mixture. Sprinkle with peanuts and reserved pretzels. Place in freezer 5–10 minutes or until ganache is set. Cut into 24 squares; cut squares in half.

Tuesday, March 2, 2010

Earings For My New Bathroom

Is it silly to think of your wall hangings as your rooms earrings? Just like adding jewelry to your outfit, what you put on your walls takes the room up a notch. The previous post included one of the "earrings". I'm getting so excited to hang this stuff up!
I found this picture in a resale shop in town. Can you guess how much I paid... $5. This piece will help bring out the wall color and introduce the dark brown color I'm thinking of using for the towels.

This hanging vase was a Christmas gift from my grandma. It's very elegant and will help me bring in a natural element to the room. I was thinking of putting small sea shells in the bottom. I'll look for natural colored flowers and a just a few stems for this.

The man is starting to think like me...

Two become one when you get married... but as the years pass it really happens. My husband has started thinking like me. He suggested this re-purpose project! I'm not sure if he's getting creative or trying to save money on the bathroom.
This black mirror/ picture thing was in our entryway (if that's what you can call it) in our first house. I had a picture of our engagement and wedding. I'm not sure what I'll put in the picture area, but for now it just has some fabric swatches. Since the bathroom has white I just sprayed it white and distressed it. I used the same knobs.

I'm not sure what I'll fill it with, but I'll think of something. Leave a comment if you have an idea.

I'd say he's got some great ideas and I didn't do too bad on actually completing the project.

Almost complete bathroom update

It's almost done!!! We're missing a working toilet, but it's in the right place. Soon I'll post the finishing touches. The end is my favorite-- not because it's almost complete, but that's where I get to do my work with little touches to bring everything together. The lights are hung...
The trim is on and painted...
The tub is caulked... The mirror and towel bar are hung... The sink and faucet are working...
It's almost a complete bathroom... The curtain is hung to hide the peach tub. We're just missing the toilet seat... and a little toilet paper :)

There's no more mouse in the house

I knew the day would come when we would get a mouse in the house. We have a large open field across the street and the day finally came. Kolin opened a cabinet and there it was.... mouse poo... For about a week we tried to kill it with the old snap traps, but the peanut butter wasn't cutting it. We just kept finding poo in the empty cabinet, but no mouse. We even found it in the drawer next to the cabinet. I finally bought the glue traps and we got him the first night... in the middle of the counter!!! What would you do if you had a live mouse stuck in super duty glue on your counter? Well my husband decided to put a bowl over it until we were able to dispose of it. Don't worry he didn't use the pampered chef ones :)
Gotcha little mouse!!!